[Flutter development] Personal Flutter Project structure with Repository pattern — Demo app
This is what I collected from my self-research. I am not a professional flutter guy, I’ve just wanted to share what I know about how to organize a Flutter project. It is based on MVC Structure. But it has a bit different when I am not using any interface (or delegate) to make the Controller implemented on it. So, this structure just like an option for you to choose. If you see any inconsequential point, please leave a comment. I am very appreciate your thought and will update to this post if possible. The source code can be find here.

Before we start
As an addition info, I will write this project with GetX for State management. If you don’t know what it is, don’t worry, I will show you how it works in the demo code. You can also using others state management method(Provider, BLoC,…). But I recommend using this one because of the performance and it is easy to use. Can not negate what GetX give us although I know a lot of people don’t like (hate) this package.
For now, you need to add GetX into your pubspec.yaml file:
get: ^4.3.8 # place this with latest version if possibleSave pubspec file then run flutter pub get. We’ve done with additional library.
Let take a general view over our code base

I have some general comments for each element of this structure. You going to understand more when I am moving into each separate element. So, stay tune.
- classes: We have subfolder bases and utils here. Bases is for defining all Base Class of this project. Utils is for utilities classes.
- config: The app config. I use it to save app internal data like theme, username,…
- controller: Controller that connect UI with Repository and define app logic here.
- model: Data classes use in app and integrating with API.
- network: Define the way app interact with API.
- repository: Getting data from internal storage or Internet.
- ui: UI, screen layout
- main: Define root of the app
- pages: Use to define each separate screen (like routes in material app)
We completed the general view of project structure. Now, let’s move in and look closer into each part.
First, open the main.dart file to see how the root look like:
In this main class, I use GetMaterialApp instead MaterialApp. GetMaterialApp is a wrapper of MaterialApp with addition functions and features for using GetX library.
This is for defining app routes. Each screen must be defined here.It helps GetMaterialApp to know what exactly what need for the screen you want to navigate to.
What I put inside the Binding class:
Before going to HomeScreen, I want the app to create the controller and the API Provider for me, so I can use these classes intermediately when I enter the home screen.
Now, leave the HomeController and APIProvider here, we will look at it later on this article in Network and Controller part.
Classes
Let’s see what inside classes/bases folder

- base_common_widget.dart: This contains some common widget using in entire app. Like show/hide loading, toast message, …
- base_controller: For each controller in the application should extend this widget (For using or defining common logic or function…)
- base_screen: Each screen in this application should extend this widget
- base_view: Each view in this application should extend this widget.
You can see more detail of what inside it here.
The base controller extends GetxController because we will use GetX as state management and we need to provide our controller class to GetX builder so, a controller use in GetX management should extend GetXController. And extend BaseCommonWidget for calling UI to show some common widget if needed.
Base screen with a generic type of controller. In this structure, each screen should have it own controller. So we can separate logic for each screen.
The tag variable is used for logging debug.
T get controller => GetInstance().find<T>(tag: null);The line above we try to find the controller type T from GetInstance. This explain why we need to put the controller in the binding class. You can check again the binding class we have this line:
Get.lazyPut(() => HomeController());So the GetInstance can find and return this controller for us to use.
And the build method return a screen widget. This is what we will create in screen layout file.
@overrideWidget build(BuildContext context) {return screen(context);}Widget screen(BuildContext context);
With base_view, I have the same idea:
But the controller here, we can reuse the same controller with the screen, where this view is displayed on.
Next, what is class/utils:
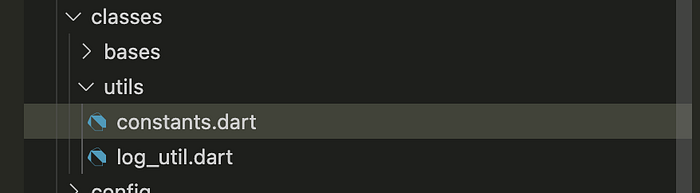
I have constants.dart for defining app constants. log_util.dart for defining log functions. See it here.
Config

Defining app config. I use this to save my base url, token,… you can create app preference here.
Models

For each screen, I created subfolder for them and added entity/response data class.
The entity class is use for data inside app
The response class is for data receive from API. And I added some mapper functions to map from the response to the entity object(The data receive from API to data use in app). The whole file:
I write factory functions to map from String to Response object, then write some extension classes to map from Response object to Entity object. So, the whole progress will be: String(json receive from api) → Response(Object that is created by parsing String json) → Entity(Object data use in app).
Network

- services: Contain service for each screen or each module (It based on how you manage your project)
Again, we see the line
APIProvider _apiProvider = GetInstance().find<APIProvider>();So, we need to provide APIProvider in the binding class.
Why I do that, why don’t we write just APIProvider _apiProvider = APIProvider()? Because we just need one api provider for all service classes. Why we just needed one? Because it can be used as a common class. We define base url and called to API server through this class. Let’s look at it:
In onInit function, we define our base url here, then next line:
httpClient.addRequestModifier((request) {return request;});
It will show the error here, but it still work fine. I don’t know why it show an error here and I don’t know how to fix it too. But it work just fine.
You can add header for request:
httpClient.addRequestModifier((request) {
String token = AppConfig.TOKEN;                        request.headers['Authorization'] = "Bearer $token";
return request;
});
This can be configured in more detail. Come to GetConnect for more info.
Look a bit down from the onInit function, we have getHome(String endpoint) function. I create a result object to store received data from API.
The result class has variables, you can custom it to what you want, I just make it with some data that is integrated perfectly with my app. The body with generic type T will be stored as the main data we receive from server.
More explain about processing data from api:
Await for get(endpoint) to get the data. We define base url in onInit function, so here we just need to call with endpoint.
When data is returned, and the result is in ok status (res.isOk) then we parsed it into a list temp named lsTemp. From lsTemp, we map it to a list type HomeItemResponse. And then, add it into result body and return the result.
So finally we have the data return from api.
Repository
We have service to called api from previous part, so the repository will take care of them as a middle transformer.

Controller

- _repository: This is for calling api
- _screenState: An object with RXDart this is where we integrated with GetX state management. When this value change, it will notify to GetX builder to rebuild the widget. So in later, we will see how UI implement GetX builder.
- screenState: State of screen. It is an int value I define in constants file. (Explain: I use a private variable _screenState for using inside the controller, so the value can be only modified inside the controller itself. From UI, we need a variable to get value, not modify. So the screenState is for it.)
- listSubCategory: For storing data.
- fetchHomeData: Call api with repository. We set screen state to loading and then success status, so the UI can know and show the right status. And let the listSubCategory = listHomeItemResponse.toEntity(). From repository, we have the HomeItemResponse object. So this is the time we use our extension to parse response data to entity data.
UI

- home_header.dart: Header view.
- home_item.dart: Item of PageView.builder() in home screen
- home_binding.dart: Injecting class for using in home screen
- home_screen.dart: Screen UI
You can see all the code of these classes here. I think it don’t have anything too difficult to understand so I won’t explain all classes. Bellow is what inside home_screen:
- routeName is the name of this home route. It uses for navigating between screen in app.
- StatefulWrapper: A custom widget from stateful widget. Here it is
child: GetX<HomeController>(init: controller,builder: (_) => controller.screenState == ScreenState.LOADING ? ... : ......
This is how we implement GetX state management based on the controller(which is extended from GetX Controller)
GetX need a controller which is a type of GetX controller to be accepted. In init parameters, I provide it with controller, this controller is from binding file and it is paired with home screen. It contain logic of home screen.
And inside the builder function, we must return a widget with the use of an .obs object that we’ve created before. In this case, it is screenState.
var _screenState = ScreenState.LOADING.obs;int get screenState => _screenState.value;
So, every time the _screenState.value change, the function with screenState will be rebuilt. And the widget will be rebuilt. So, the view will change follow the screenState change.
In short, this article provide how my Flutter project look like, how I organize my code. I use GetX as my state management and have no complain with it. The project has 7 main folders with separate task: classes, appconfig, controller, model, network, repository, ui.
That’s the end of the article. I’ve shown all the things I have in my flutter app structure. I know it have not been perfect yet. But if you can learn anything from my article, I will be very happy. And if you have any improvement, go ahead and let me know. I also must to learn more and more.
Thanks for reading until here. A big thanks to you again!